Pages

Friday, December 31, 2010

Cranberry Salsa


Did anyone else over indulge on spicy gingerbread and sparkly sugar cookies this past week?

How about all those boxes of chocolates laying around the house?
You can tell me.
You ate at least half the box, didn't you?


I'm not judging. I'm celebrating.
 Thank goodness, I'm not the only one who's been in a sugar coma.

But....


since it's New Year's Eve, it's time for me and everyone else to wake up with something tangy, tart and delicious!

 And, as you've probably already guessed, I have the perfect recipe for you.


Tart cranberries, zesty jalapeno and a bunch of other adjectives attached to food is what makes this so special.
I was a bit skeptical when my husband's aunt (Hi Tammie!) recommended this to me but now that I've tried it.... I'm in love.


 Try this one out while cranberries are in season and your head is still swimming from all those sugar plums.
HAPPY NEW YEAR.

Cranberry Salsa
Makes a lot! about 3 cups of salsa
Generously adapted from What's Cooking America

3 cups (12oz bag) fresh or frozen cranberries
¼ cup minced green onion
1 tbsp minced jalapeno pepper (about 1 small one)
¼ cup honey
¼ cup fresh cilantro leaves, minced
2 tbsps finely grated ginger
1 lime, juice and zest
1 8oz pkg cream cheese

Directions:
1. Add all ingredients except  the cream cheese to the food processor and pulse until cranberries are coarsely chopped.
2. Refrigerate 4 hours before using to allow flavors to meld. (The salsa will not be good if you skip this step, just trust me.)
3. Serve over a block of cream cheese alongside crackers, pita bread or tortilla chips.


Wednesday, December 22, 2010

Homemade Marshmallows


These! 
These are what I've been wanting to make!
Something overly festive that just screams "CHRISTMAS!!!" 


Perfect fluffy white marshmallows covered with red and green sprinkles.
They make me feel "♫merry and briiiiighhhhhtttt♫
(and my all your Christmases be white)''.


Marshmallows are surprisingly easy to make.
Some gelatin, lots of sugar and corn syrup beaten together for 10 minutes and voilà!
Marshmallows.


The advantages for making them at home are endless.
You can flavour them any way you want (peppermint, coconut, almond, rum.....), you can play with food coloring (use a toothpick to swirl in red and green) and you can shape them however your heart desires (drop them by the spoonful, pipe them into letters or swirls, or use a well-oiled cookie cutter to cut them out of a baking pan).


I've made marshmallows from Martha Stewart before and they were okay, but this recipe turned out much better.  I think the extra gelatin in the recipe made them firmer and less sticky than the former.

On hot chocolate, these look like fresh dollops of whip cream.

Impress your friends and family this christmas with these delicious marshmallows. (One word of warning: they can be quite sticky so don't be stingy with the icing sugar!)

Homemade Marshmallows
Makes: about 60 x 2'' square marshmallows
Source: Dinner with Julie

3 pkg (3 tbsp) plain gelatin
1½ cups sugar
1 cup light corn syrup ( I ran out of light corn syrup and used some dark - it worked fine)
2 tsp vanilla, coconut, peppermint or almond extract
icing sugar for dusting
sprinkles (optional)
2oz melted chocolate (optional)

Directions:
1In a small bowl sprinkle the gelatin over 1/2 cup water. In a medium pot, combine the sugar and another 1/2 cup water and bring to a simmer; add the softened gelatin mixture and stir until fully dissolved and hot to the touch.
2. Pour into a large bowl (if using a stand mixer, use the whip attachment), add the corn syrup and extract and beat on high for about 10 minutes, until the mixture cools and increases in volume until it is billowy, white and forms soft peaks (much like meringue).
3. Pour into a 9'' x 13'' pan lined with parchment and dusted generously with icing sugar, or spoon into a large zip-lock back, snip off a large piece of one corner and pipe shapes, letters or swirl onto a piece of parchment generously dusted with icing sugar. If using, decorate with sprinkles while marshmallows are still sticky.
4. Let cool completely. If desired, drizzle melted chocolate over marshmallows. If you need to, cut into squares using a well-oiled sharp knife.

Monday, December 20, 2010

Chocolate Sandwich Cutout Cookies


I'm done Christmas baking.

My freezer is stuffed.
My kitchen is covered with a layer of flour dust.
My blood sugar is through the roof and my teeth ache.


Despite all that, I don't think I can stop.


It's an addiction.
An unhealthy one at that.

Hello, my name is Jesse and I'm addicted to baking.


Just the other day I was making up a platter (from my 20 containers of baked goods) to take to a function and all I could think of was how I haven't made anything with red and green sprinkles.

Sure, I have these beautiful chocolate sandwich cookies, filled with minty green and raspberry red icing. 
They're festive, right?
Pretty to look at, great to eat, but they still don't fit the bill.

They lack a certain holiday tackiness.


But don't worry. 
I'm going to find something to make. 
It'll be red and green and white and tacky to the max.


Meanwhile, you can try out these chic sandwich cookies.
The chocolate cookie part is really good; in fact, you might even want to forgo the icing and just eat these as is. The dough is easy to work with, it's very forgiving and can be rolled and re-rolled as much as you want. I found the raspberry icing lacking in flavour but the mint was minty good.

Chocolate Sandwich Cutout Cookies
Makes: about 15 sandwiches
Adapted from Martha Stewart

For the cookies:
¾ cup all-purpose flour
⅓ cup dutch process cocoa powder
⅛ tsp salt
6 tbsp unsalted butter, softened
¾ cup icing sugar
1 large egg
½ tsp vanilla extract

For filling:
6 tbsp unsalted butter, softened
2 cups icing sugar
Mint:
½ tsp peppermint extract
2 drops green food coloring (optional - but you know you want too)
Raspberry:
½ cup raspberry jam, heated and strained (like I said earlier, I didn't find this very flavourful so you may want to use more jam or some raspberry flavouring to enhance the taste)

Directions:
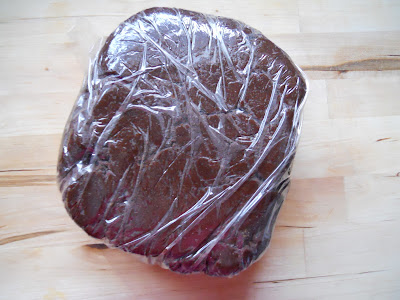
1. For the cookies: Whisk together flour, cocoa, and salt. With an electric mixer on medium-high speed, cream butter and confectioners' sugar until pale and fluffy. Beat in egg and vanilla. With mixer on low speed, gradually add flour mixture, beating to combine. Divide dough in half; form into disks, and wrap in plastic. Chill until firm, at least 2 hours, or up to 2 days. (Dough can be frozen up to 2 months; thaw in the refrigerator before using.)
2. Line baking sheets with parchment paper, lightly coat with cooking spray. Working with one disk at a time, roll out dough to a 1/8-inch thickness on a lightly floured surface. Using a 1 1/2-inch square biscuit or cookie cutter, cut out shapes, transferring to prepared sheets (1 inch apart) as you work. Chill in freezer until firm, about 15 minutes. Brush off excess flour. Gather together scraps; roll, chill, and cut out more shapes.
3. Preheat oven to 325°F. Bake cookies, rotating sheets halfway through, until edges are firm, 12 to 14 minutes. Transfer cookies, on parchment, to a wire rack to cool completely.
4. Meanwhile, prepare the fillings. Beat butter until smooth. Add icing sugar and continue beating until light and fluffy. Divide the icing among 2 bowls. To one bowl stir in the mint ingredients and to the other stir in the strained raspberry jam.
5. Spread a small amount of mint filling on one quarter of the cookies and raspberry filling on one quarter of the cookies. Top with remaining cookies, gently press to adhere. Refrigerate in an airtight container for 4 days or freeze for up to 1 month.

Friday, December 17, 2010

Breakfast Quinoa


This recipe must of hopped on my blog when I wasn't looking.


A recipe without sugar and butter?

I haven't seen one of those around here in a long time.

It doesn't even have wheat or dairy.

Nope, doesn't look like something that went on in my kitchen this month!


But that is my pot.
And these pictures do look familiar.

Actually,
I think it's coming back to me.... 
that's right, I ran out of sugar last week.

 I was forced to revert to my pre chrismas baking days and make this hot cereal (or hot grain).


Come to think of it... I didn't even miss the butter or sugar.

The quinoa (keen-wa) is cooked in apple juice and studded with raspberries, making it naturally sweet enough.
The almonds even gave it a nice crunch (just like a crispy christmas cookie).

I should make this again....


Why don't we all eat this nice healthy breakfast this weekend so we can eat all the Christmas sweets that are coming to us next week? 
Good plan?
Good plan.

Breakfast Quinoa
Makes: 2 cups
Adapted from: Martha Stewart.

1 cup quinoa, rinsed
2 cups apple juice (or substitute any type of milk)
1 cup raspberries or blueberries
½ cup almonds, toasted
 ⅛ tsp ground cinnamon (optional)

Directions:
1. Bring juice (or milk) to a boil in a small saucepan over medium high heat. Add quinoa and return to a boil. Reduce heat to low and simmer for 15 minutes or until 3/4 of the milk has been absorbed.
2. Stir in cinnamon (if using), continue to cook covered for about 8 minutes or until all the milk has been absorbed.
3. Stir in berries and cook for about 30 seconds (longer if berries are frozen).
4. Remove from heat and stir in almonds. Serve with milk, additional berries, cinnamon and brown sugar.


Wednesday, December 15, 2010

Cinnadoodles


I made 135 of these cookies last week.
I know I usually exaggerate, but this is for real.


One hundred and thirty five cookies.

Wow. Sometimes I amaze myself.


They weren't all for me, though.
9 dozen (108 cookies) were for a cookie exchange.


I've heard a lot of good and bad things about cookie exchanges but I'm happy to report the one I attended (thanks to Crystal for hosting it) was a success!

There was an excellent variety of baked goods being exchanged and they were all delicious:

Triple Chocolate Cookies
Butter Tart Bars
Chocolate Caramel Crunch Cookies
Peanut Butter Balls
Chocolate Chunk Brownie Buttons
Gingersnaps
Chocolate Pecan Caramel Thumbprints


Not bad, eh? (My canadian accent really comes out at Christmas time)

Best of all, I can justify eating more baking because, you know, I wouldn't want to offend anyone by not eating their goodies ; )

Packed up and ready to be exchanged

Cinnadoodles
Makes: 4 dozen cookies
Adapted from here. Inspired from here.

2 tsp cream of tartar
2 ¾ cups flour
½ tsp salt
1 tsp baking soda
1 ½ cups sugar
1 cup butter ( I used ½cup butter and ½ cup margarine)
2 eggs
1 cup cinnamon hearts or cinnamon chips plus more for on top of each cookie

¼ cup granulated sugar
1 tsp ground cinnamon

Directions:
*Note: The cinnamon hearts (or chips) can either be mixed in right away with the dry ingredients or a few can be stuffed into the middle of each cookie dough ball. I used the second method because I didn't like the look of the cinnamon candies throughout the batter. When they were cooked they sort of oozed and melted all around the cookie. By stuffing them in the middle the cookie had a cinnamon centre. Regardless of my choice, either method will work fine.

1. Mix together the cream of tartar, flour, salt, baking soda and cinnamon hearts (see note above). Set aside.
2. Cream together the butter and sugar until light and fluffy, about 2 minutes. Add eggs and continue beating until well blended.
3. Add dry mix to the creamed mixture and blend until thoroughly incorporated.
4. In a separate bowl, mix together the ¼ cup sugar and cinnamon.
5. Form into balls ( I weighed mine out into 25grams) and roll in cinnamon sugar mixture. Press 1 cinnamon chip or candy into the top of the ball for decoration.
6. Place cookies 2'' (they spread a lot) apart on an ungreased cookie sheet and bake at 350°F for 11 minutes.

Monday, December 13, 2010

Chai Shortbread


It can't be Christmas without shortbread!

It's no surprise that shortbread is sorta like the quintessential baked good of Christmas.
Tender, buttery, sweet goodness formed into a cookie.
Delicious.


It's also no wonder why the world only makes shortbread once a year;
if we made it all the time we'd all weigh 500 pounds and have heart conditions.

Well, maybe not you..... you probably possess a lot more self control than I do.


Because my mom usually makes authentic shortbread (ya know the stuff that's just butter, cornstarch and icing sugar), I opted to make this chai shortbread.
It's based on a scottish shortbread recipe which uses rice flour to give the cookie a nice texture.


They're kind of gritty, but like gritty in a good way.
 Like if you wanted to eat a gritty cookie that was also buttery..... not gritty like sand, gritty like sugar crystals....... 

I'm ruining this cookie for you, aren't I?

The grit is a good thing.
Just trust me.


Even better than the grit is that I adapted this recipe to work in my cookie press by adding a few drops of water to the cookie dough.
(I can be pretty sharp sometimes, when I'm not having a blonde day).


Take advantage of this time of year and make these cookies (with or without a cookie press).  It's the only time of year no one will judge you for eating the whole batch by yourself.

Chai Spiced Shortbread
Makes about 4 dozen sandwich cookies
Generously adapted from: Land 'o Lakes 2008 'Holiday Cookies' Magazine

For the cookie:
1 cup butter, softened
¾ cup powdered sugar
½ tsp ground cardamon
½ tsp ground cinnamon
½ tsp ground ginger
¼ tsp ground nutmeg
½ cup rice flour (brown or white)
1 ½ cups all purpose flour

For the buttercream:
2 tbsp cream or milk
½ tsp instant coffee granules
2 cups powdered sugar
¼ cup butter, softened
¼ tsp ground cardamon
¼ tsp ground cinnamon
⅛ tsp ground ginger

Directions:
1. Preheat oven to 325°F. Combine all cookie ingredients except flour in a large bowl; beat at medium speed until creamy. Reduce speed to low; add flour and continue beating until well mixed. If you are using a cookie press, add 1 tbsp of water to the dough and beat until incorporated. 
2. If using a cookie press, proceed according to the manufacturer's instructions. If not, shape dough into 1'' balls. Place 2'' apart onto an ungreased cookie sheet; gently flatten.
3. Bake for 11 to 13 minutes or until set and cookies are lightly brown. Cool 1 minute on cookie sheet; remove to wire cooling rack. Cool completely.
4. Meanwhile, combine cream (or milk) and instant coffee in a medium bowl; stir until coffee is dissolved. Add all remaining buttercream ingredients; beat at low speed until moistened. Increase speed to high; beat until smooth and creamy. Spread 1 tsp of filling onto bottom side of 1 cookie; top with second cookie, bottom-side down. Repeat with remaining cookies.

Friday, December 10, 2010

Apple Butter


Not too long ago, I made some spiced vanilla pear butter
I had originally intended on subbing apples into the same recipe to make apple butter but that thought quickly bored me...... so I went a different way :)

I cored the apple before I noticed the recipe said to leave the cores in.... oops.

The cinnamon, cloves and allspice in this recipe are right up my alley and a nice change from the pear butter's cardamon and vanilla.

I used a baby food mill to get the apple skin out of the sauce.... worked like a charm!

I reduced the vinegar down to about ¼ cup and I wish I hadn't. Even though I also reduced the sugar the butter is overly sweet and I think the proper amount of vinegar would've balanced out the sweetness.

Just an observation.


Nonetheless, I have a bunch of this stuff now (12 x 4oz jars!) and it's still pretty good.
I've been stirring it into plain yogurt, quinoa and oatmeal for breakfast and giving it away in Christmas packages.

This was attached to my legs during this whole apple butter making process.... Pick me up!

Apples are still in abundance around here and this would make a great (and cheap) homemade gift.
Just in case you were wondering ;)

Apple Butter
Makes: about 3 pint jars

4 pounds of apples (use good cooking apples such as Granny Smith or Pink Lady)
1 cup apple cider vinegar
2 cups water
sugar (about 4 cups)
salt
2 tsps cinnamon
½ tsp allspice
½ tsp cloves
juice and zest of 1 lemon

Directions:
1. Cut the apples into quarters, without peeling or coring them (much of the pectin is in the cores and flavor in the peels), cut out damaged parts.

2. Put them into large pot, add the vinegar and water, cover, bring to a boil, reduce heat to simmer, cook until apples are soft, about 20 minutes. Remove from heat.

3. Ladle apple mixture into a chinois sieve (or foodmill) and using a pestle force pulp from the chinois into a large bowl below. Measure resulting puree. Add 1/2 cup of sugar for each cup of apple pulp. Stir to dissolve sugar. Add a dash of salt, and the cinnamon, ground cloves, allspice, lemon rind and juice. Taste and adjust seasonings if necessary.

4. Cook uncovered in a large, wide, thick-bottomed pot on medium low heat, stirring constantly to prevent burning. Scrape the bottom of the pot while you stir to make sure a crust is not forming at the bottom. Cook until thick and smooth (about 1 to 2 hours). A small bit spooned onto a chilled (in the freezer) plate will be thick, not runny. You can also cook the purée on low heat, stirring only occasionally, but this will take much longer as stirring encourages evaporation. (Note the wider the pan the better, as there is more surface for evaporation.)

Canning:

5. There are several ways to sterilize your jars for canning. You can run them through a short cycle on your dishwasher. You can place them in a large pot (12 quart) of water on top of a steaming rack (so they don't touch the bottom of the pan), and bring the water to a boil for 10 minutes. Or you can rinse out the jars, dry them, and place them, without lids, in a 200°F oven for 10 minutes.

6. Pour into hot, sterilized jars and seal. If you plan to store the apple butter un-refrigerated, make sure to follow proper canning procedures. Before applying the lids, sterilize the lids by placing them in a bowl and pouring boiling water over them. Wipe the rims of the jars clean before applying the lids. I use a hot water bath for 10 minutes to ensure a good seal.

As an alternative to stove cooking the puree you can cook uncovered in a microwave, on medium heat to simmer, for around 30 minutes.

Wednesday, December 8, 2010

Marshmallow Puff Tartlets


Was anyone else awoken by the smell of fresh fecal matter this morning?
Oh.... it was just me then..... that's a shame.
I guess that's what happens when you make the almighty bran muffin part of a baby's snack time.


I'm not going to lie, for about 2 seconds I thought about just going back to sleep.... and then I caught sight of the tell-tale brown puddle forming through my little one's sleeper and onto my sheets.
*Sigh*
Forced out of bed, I had washed sheets, pajamas and a little body by 6:00am.


What does that have to do with Marshmallow Tartlets?
Nothing.

Except that I really need to break into my Christmas baking today to ease the horror of my morning and I'm going to start with these.

Christmas baking can get messy, in more ways than one. This is what happens when you forget there's a baby loose in the house.

They're sorta like a Viva Puff but without the cookie and the chocolate coating.
The recipe does call for the chocolate coating but I thought it was an unnecessary step.

(Did you see my broken dishes? I don't really have the multitasking abilities for unnecessary steps.)


I found these pretty simple to make.
Pressing the chocolate in the pan to make the crust was a bit tedious but I'm willing to do tedious things in the name of Christmas. 


Go ahead and make these.... they're good enough to erase the horror of even the worst morning.


Marshmallow Puff Tartlets
Makes about 48
Source: Canadian Living 2010 'Special Issue Cookbook'

½ cup unsalted butter
⅓ cup white sugar
1 egg
1 tsp vanilla
1 cup all purpose flour
⅓ cup cocoa powder
¼ tsp salt
¼ cup strawberry jam
24 marshmallow, cut in half lengthwise

2oz each bittersweet and milk chocolate , coarsely chopped
1 tsp vegetable oil

Directions:
1. In a large bowl, beat together butter and sugar until light and fluffy; beat in egg and vanilla. In a separate bowl, whisk together flour, cocoa powder and salt; stir into butter mixture to make a stiff dough. Wrap and refrigerate for 15 minutes.

2. By rounded 1 tsp, press dough into ¾ inch deep mini tart cups. Refrigerate for 20 minutes.

3. Prick bottom of each shell twice. Bake in a 350°F oven until bottoms are dark and edges are brown, about 10 minutes.

4. Immediately spoon ¼ tsp jam into each tart shell; top with marshmallow half, cut side down. Bake until marshmallow is slightly melted but still white, about 2 minutes.

5. While warm, press marshmallow slightly to seal shell. let cool in pan for 5 minutes; remove from pan and let cool on rack.

6. In a small heatproof bowl over a saucepan of simmering (not boiling) water, melt together bittersweet chocolate, milk chocolate and oil. Remove from heat. Dip marshmallow tops into chocolate mixture ; let stand on rack until set, about 30 minutes.

Monday, December 6, 2010

Tangy Lemon Bars


Is anyone else freakin' excited for Christmas?!?!


There's only 19 (!) more days to enjoy the anticipation of Christmas.

I don't even care that there's still so much to do: presents to be bought and wrapped, parcels to be sent, cookies to be baked, and did I mention presents to buy?

That's the most exciting part, all the festivities leading up to the Big Day.


You know, I really should've been one of Santa's elves.

I already prepare year round for Christmas.
I just wouldn't want to build toys.
Or live at the North Pole. I hate being cold.

But I would be a baker elf! Yes, that's it. A baker elf and I would bake Christmas goodies all year long, bringing joy and peace to all that partake.

(I just got all 3 of 'the Santa Clause' movies and I think I've watched them so many times they're starting to mess with my reality.)


I've really digressed from anything to do with lemon bars, haven't I?

Here's what a certain baker elf wanted to say about these lemon bars.

This tart lemon bar is a nice balance to the sweet stuff (eggnog fudge) I've been making lately.

Their one downfall is the crust to filling ratio is much too high for my liking. 


If there's a shortage of baker elves around and you want to try these out yourself, I recommend either cutting the recipe in half for the crust or making 50 percent more filling (multiply each ingredient by 1.5 -  I could be a math elf too.)

Tangy Lemon Bars
Makes: 36 bars
Adapted from: Land 'o Lakes 2008 'Holiday Cookies' Magazine

For the base:
2 cups all purpose flour
¾ cup sugar
¾ cup softened butter

For the filling:
2 cups sugar
¼ cup lemon juice
4 eggs 
2tsp finely grated lemon zest
⅛ tsp salt
¼ cup all purpose flour
1 tsp baking powder

For the glaze:
1 cup powdered sugar
1 tbsp softened butter
½ tsp vanilla extract
1½ to 2 tbsps lemon juice

Directions:
1. Preheat oven to 350°F. Combine all base ingredients in a large bowl. Beat at medium speed, scraping bowl often until mixture resembles fine crumbs.
2. Press mixture into an ungreased (I greased mine anyways) 9'' x 13'' baking pan. Bake for 18 - 22 minutes or until very lightly browned.
3. Meanwhile, combine all filling ingredients except flour and baking powder. Beat at medium speed until well mixed. Reduce speed to low and add flour and baking powder. Beat until well mixed. Pour filling over hot, partially baked crust. Continue baking for 23 to 25 minutes or until top is golden brown. Cool completely.
4. Combine all glaze ingredients except lemon juice in a separate bowl. Beat at low speed, gradually adding lemon juice until desired consistency is reached. Drizzle over cooled bar. Cut into pieces.
Related Posts Plugin for WordPress, Blogger...