Pages

Showing posts with label homemade ingredient. Show all posts

Monday, April 4, 2011

Easy Caramel Sauce


A few nights ago I made dinner for my mother-in-law and my mother.
(John and the baby were there too but they don't count.)


For some reason it didn't occur to me to make a dessert until the last minute.
I'm not sure why since dessert is my favorite part of dinner, duh!?

After taking a quick look in my fridge and seeing 3(!) different varieties of apples I was inspired to make a caramel dip. 


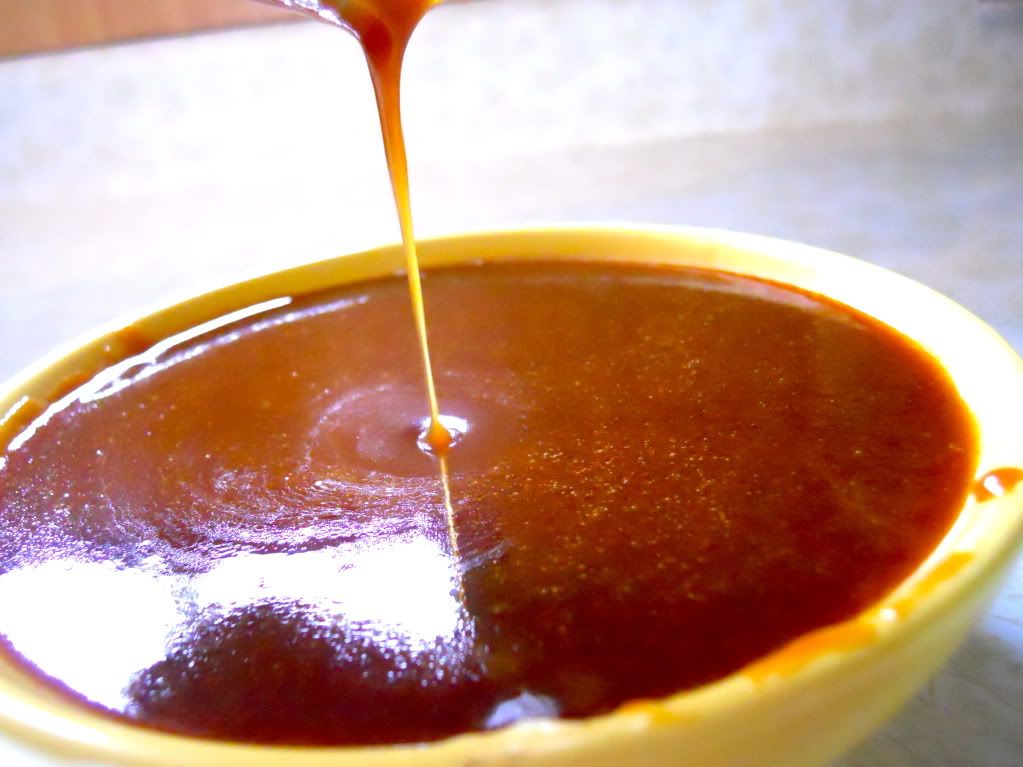
This caramel was easy and quick to make, I think it took less than 10 minutes from start to finish. The sauce was delicious although I over cooked the sugar a touch so it tasted slightly like burnt sugar.
It was still good though and a winner with my mom and MIL.

I definitely recommend it for dipping apples, pouring on ice cream, adding to coffee or drinking straight from the jar.

Oh, and on a completely different note:


Look up cute in the dictionary and you'll find this face right here.

Easy Caramel Sauce
Makes: about 1 cup

1 cup sugar
6 tbsp butter
½ cup heavy cream

Directions:
1. First, make sure you have everything ready to go - the butter and cream right next to the pan, ready to put in. Caramel is a fast process that can't wait for hunting around for ingredients.
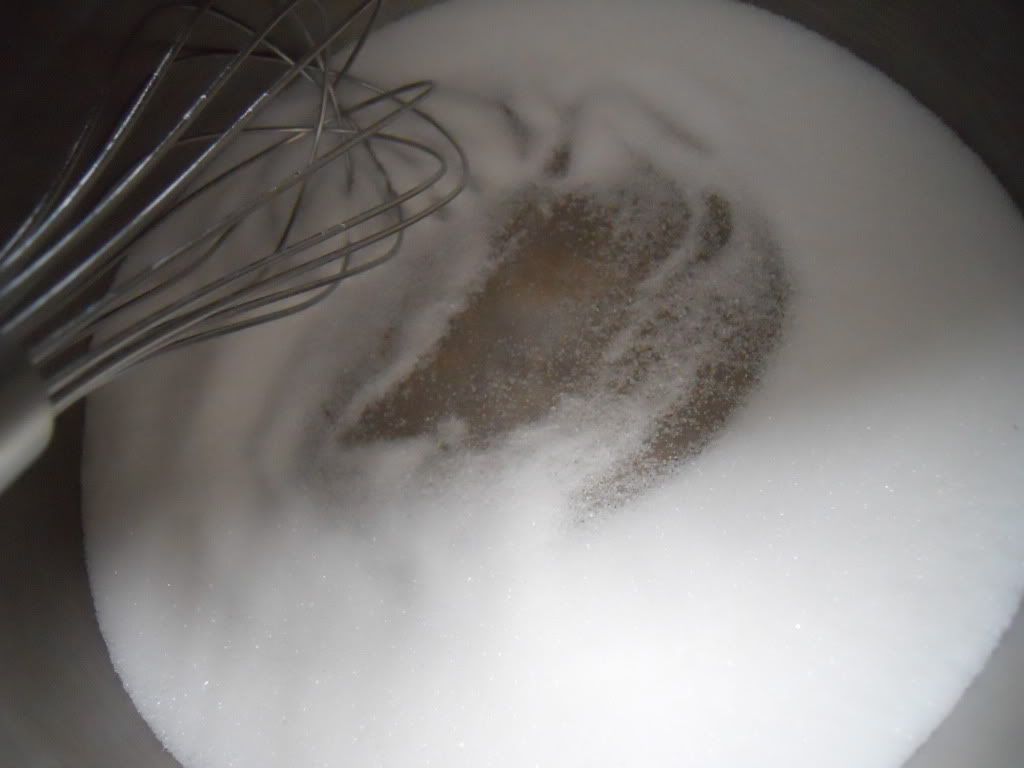
2. Heat sugar on moderately high heat in a heavy-bottomed 2-quart or 3-quart saucepan. As the sugar begins to melt, stir vigorously with a whisk or wooden spoon. As soon as the sugar comes to a boil, stop stirring. You can swirl the pan a bit if you want, from this point on. Note that this recipe works best if you are using a thick-bottomed pan. If you find that you end up burning some of the sugar before the rest of it is melted, the next time you attempt it, add a half cup of water to the sugar at the beginning of the process, this will help the sugar to cook more evenly, though it will take longer as the water will need to evaporate before the sugar will caramelize.
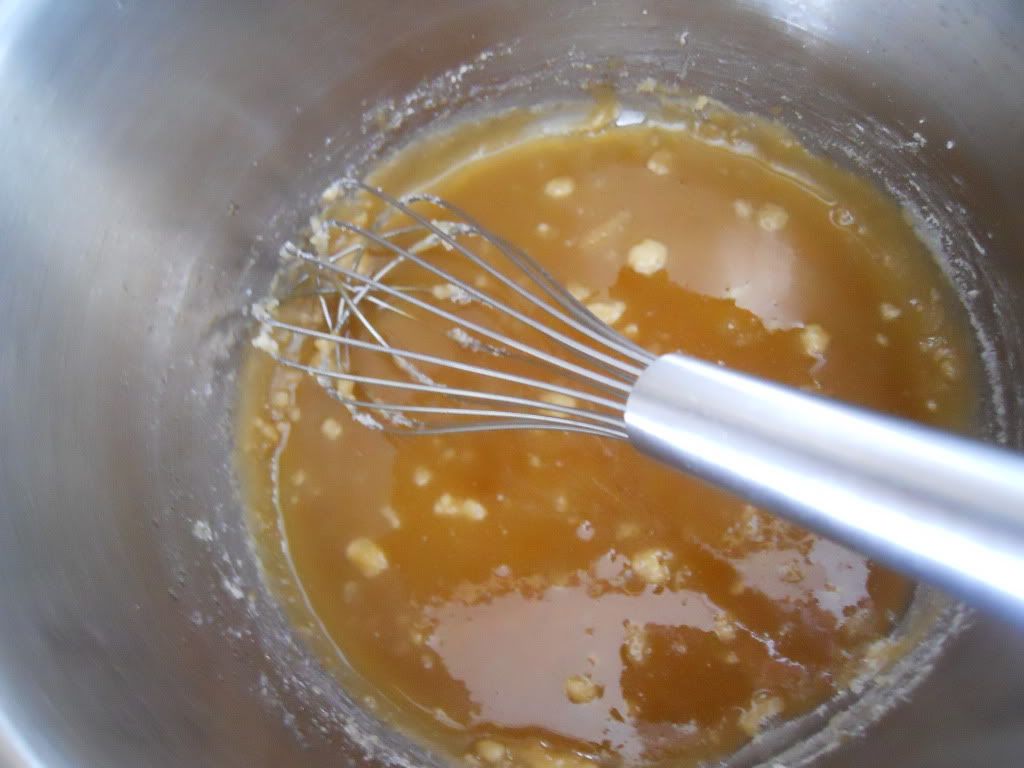
3. As soon as all of the sugar crystals have melted (the liquid sugar should be dark amber in color), immediately add the butter to the pan. Whisk until the butter has melted.
4. As soon as all of the sugar crystals have melted (the liquid sugar should be dark amber in color), immediately add the butter to the pan. Whisk until the butter has melted.
5. Whisk until caramel sauce is smooth. Let cool in the pan for a couple minutes, then pour into a glass mason jar and let sit to cool to room temperature. (Remember to use pot holders when handling the jar filled with hot caramel sauce.) Store in the refrigerator for up to 2 weeks. Warm before serving.

Monday, March 14, 2011

Butter Olive Oil Spread


Today, I bring you an extremely complicated recipe.
It involves multiple steps, exotic ingredients and unusual kitchen gadgets.

Are you ready for it?

Do you have some of this in your kitchen:


What about some of this:


Do you know how to beat together butter and olive oil?
Oh, you do.
Well I take back what I said.
This is actually the easiest thing you'll ever make. Ever.

Use it instead of tub margarine to spread on toast, baked potatoes, you name it.


Given that margarine is pretty close to being plastic, your body will thank you for making this.
It'll thank me for giving you this recipe.
So - you're welcome. 

Butter Olive Oil Spread
Makes: about ¾ cups

½ cup softened butter
6 tbsp extra virgin olive oil
pinch of salt

Directions:
1. Beat together softened butter and olive oil until well combined. Season with salt to taste. The mixture will be the consistency of mayonnaise. Refrigerate until it reaches a spreadable consistency. 

Friday, January 28, 2011

Chocolate Peanut Butter


This post should really be called. "How to make your toast taste like a Reeses Peanut Butter cup."
'Cause that's what's happened here.
My breakfast has turned into dessert.


And it's awesome.


In fact, I'm not gonna lie to you, I just broke out a spoon and dug into this stuff.
Yea... it's addictive. 


I should really trade my spoon for an apple slice.
Peanut butter, chocolate and apples... yum.
Or bananas.... peanut butter, chocolate and bananas..... even better. 


I'm not gonna bother trying to convince you how good chocolate peanut butter is, it speaks for itself.
Just make this.

Chocolate Peanut Butter
Makes: about 1 1/2 cups
Adapted from Smitten Kitchen

Note: I didn't want this to be too sweet so I didn't add a ton of sugar. Feel free to add more salt or sugar depending on your taste.

1½ cup natural peanut butter
½ cup unsweetened good quality cocoa powder
½ cup powdered sugar (add more of less depending on preference)
¼ tsp salt
2 tbsp peanut oil (I just used the extra oil from the peanut butter jar)

Directions:
1. Add peanut butter, cocoa powder, sugar and salt to a food processor. Blend on low speed until smooth. Slowly add oil through the feed tube with the mixer still running. Blend another minute or so until everything is incorporate. Enjoy on toast or straight from the jar!

Wednesday, January 26, 2011

Vegetable Bouillon


How did it get to be January 26th already?
It's almost time to put my tree back up.

The weather in Revelstoke seems to agree with me. The snow keeps falling by the foot, giving the town a winter-wonderland-christmas-is-almost-here kind of feel.


To be honest, I don't mind one bit.
I find this weather conducive to roasting vegetables and making lovely hearty soups.
And c'mon, who doesn't love a lovely hearty soup?

Before I make all these soups (which I probably won't actually do since my husbands more of a meat and potatoes hold the veggies kinda guy), I'm stocking my freezer with this terrific

Homemade Bouillon

(pretend to be blown away by this announcement.)


Yes, you can make it at home.
In your kitchen.

It blew me away too.

Typically made from dehydrated vegetables, spices, and fat, bouillon is a quick way to make broth. Unfortunately, the stuff you buy in the store is generally laced with a lot of chemical preservatives, too. That's why making your own is so great. You can use any vegetables and herbs that are in season (although I'd stay away from watery ones like tomatoes) to make this flavourful vegetable paste.


Use it to season soups, grains and anything else your heart desires.

Vegetable Bouillon
Makes: approx 3 cups
Barely adapted from: 101 cookbooks, originally from The River Cottage Preserves Handbook

Note: Depending on the size of your food processor, you may need to grind down the vegetables in batches to make room for everything. This is pretty salty, you can always omit the salt and add it later to taste. Just remember, the salt acts as a preservative so the bouillon won't keep as long in your fridge.

150g (about 1) leek sliced and washed
200g (about 1 stalk) fennel, chopped
200g (about 3) carrots, sliced and well washed
100g (about 2 stalks) celery
100g (good sized chunk) celery root (celeriac)
30g (about a handful) sun-dried tomatoes
100g(about 3) shallots, quartered
3 garlic cloves
50g (about 1/4 cup) fine grain sea salt
40g (about 1/4 bunch) parsley
60g  (about 1/2 bunch) cilantro

Directions: 
1Place the first four ingredients in your food processor and pulse about twenty times. Add the next four ingredients, and pulse again. Add the salt, pulse some more. Add the parsley and cilantro. You may need to scoop some of the chopped vegetables on top of the herbs, so they get chopped.
2. You should end up with moist, loose paste. If it looks chunky, just keep chopping! Keep 1/4th of it in a jar in the refrigerator for easy access and freeze the remaining 3/4 for use in the next month. Because of all the salt it barely solidifies making it easy to spoon directly from the freezer into the pot before boiling. Start by using 1 teaspoon of bouillon per 1 cup (250 ml), and adjust from there based on personal preference.


Wednesday, January 5, 2011

Homemade Mascarpone


You can pinch yourself. You're not dreaming.
You can really make this stuff at home.

(I kinda sounded like an infomercial there.)


All it takes is a lot of cream.
The good stuff. At least 25% milk fat.
You heard me: twenty five percent milk fat.


A lemon.
Some cheese cloth.
A candy thermometer and patience.
I bet the most difficult thing to come by in this list is patience. I know that all too well....*sigh.


I found the mascarpone a bit on the lemony side (go figure....) but I believe you can substitute ¼ tsp of citric acid for the lemon juice if you don't want that little bit of lemon flavor. I haven't tried the citric acid yet but I did research it for the next time I make mascarpone. If you do try it, leave me a comment and let me know how it works out for you.


Mascarpone is a soft creamy cheese that is delicious in desserts. (Did you catch that? I'm foreshadowing a recipe to come.... make the cheese and you'll be ready for it!)

Homemade Mascarpone
Makes: about 1 cup

1L heavy cream (at least 25% milk fat)
1 lemon

cheesecloth
candy thermometer
large sieve

Directions:
1. In a medium size saucepan slowly heat the cream, stirring constantly, until it reaches 190 degrees.
2. Squeeze lemon to extract 2 tbsps of juice. Line your sieve with about 4 layers of cheesecloth and set it over a large bowl. 
3. Add the lemon juice and continue to stir until the cream slightly thickens.(Should coat the back of a spoon.) Set the cream aside to cool for about 30 minutes.
4. Pour the cream into sieve and let completely cool. Place bowl and sieve in the refrigerator overnight.
5. By morning, the whey will have completely separated leaving you with a bowl of fresh, creamy, mascarpone. Place in a sealed container in the refrigerator. Best used with 1 week.

Friday, December 10, 2010

Apple Butter


Not too long ago, I made some spiced vanilla pear butter
I had originally intended on subbing apples into the same recipe to make apple butter but that thought quickly bored me...... so I went a different way :)

I cored the apple before I noticed the recipe said to leave the cores in.... oops.

The cinnamon, cloves and allspice in this recipe are right up my alley and a nice change from the pear butter's cardamon and vanilla.

I used a baby food mill to get the apple skin out of the sauce.... worked like a charm!

I reduced the vinegar down to about ¼ cup and I wish I hadn't. Even though I also reduced the sugar the butter is overly sweet and I think the proper amount of vinegar would've balanced out the sweetness.

Just an observation.


Nonetheless, I have a bunch of this stuff now (12 x 4oz jars!) and it's still pretty good.
I've been stirring it into plain yogurt, quinoa and oatmeal for breakfast and giving it away in Christmas packages.

This was attached to my legs during this whole apple butter making process.... Pick me up!

Apples are still in abundance around here and this would make a great (and cheap) homemade gift.
Just in case you were wondering ;)

Apple Butter
Makes: about 3 pint jars

4 pounds of apples (use good cooking apples such as Granny Smith or Pink Lady)
1 cup apple cider vinegar
2 cups water
sugar (about 4 cups)
salt
2 tsps cinnamon
½ tsp allspice
½ tsp cloves
juice and zest of 1 lemon

Directions:
1. Cut the apples into quarters, without peeling or coring them (much of the pectin is in the cores and flavor in the peels), cut out damaged parts.

2. Put them into large pot, add the vinegar and water, cover, bring to a boil, reduce heat to simmer, cook until apples are soft, about 20 minutes. Remove from heat.

3. Ladle apple mixture into a chinois sieve (or foodmill) and using a pestle force pulp from the chinois into a large bowl below. Measure resulting puree. Add 1/2 cup of sugar for each cup of apple pulp. Stir to dissolve sugar. Add a dash of salt, and the cinnamon, ground cloves, allspice, lemon rind and juice. Taste and adjust seasonings if necessary.

4. Cook uncovered in a large, wide, thick-bottomed pot on medium low heat, stirring constantly to prevent burning. Scrape the bottom of the pot while you stir to make sure a crust is not forming at the bottom. Cook until thick and smooth (about 1 to 2 hours). A small bit spooned onto a chilled (in the freezer) plate will be thick, not runny. You can also cook the purée on low heat, stirring only occasionally, but this will take much longer as stirring encourages evaporation. (Note the wider the pan the better, as there is more surface for evaporation.)

Canning:

5. There are several ways to sterilize your jars for canning. You can run them through a short cycle on your dishwasher. You can place them in a large pot (12 quart) of water on top of a steaming rack (so they don't touch the bottom of the pan), and bring the water to a boil for 10 minutes. Or you can rinse out the jars, dry them, and place them, without lids, in a 200°F oven for 10 minutes.

6. Pour into hot, sterilized jars and seal. If you plan to store the apple butter un-refrigerated, make sure to follow proper canning procedures. Before applying the lids, sterilize the lids by placing them in a bowl and pouring boiling water over them. Wipe the rims of the jars clean before applying the lids. I use a hot water bath for 10 minutes to ensure a good seal.

As an alternative to stove cooking the puree you can cook uncovered in a microwave, on medium heat to simmer, for around 30 minutes.

Monday, November 22, 2010

Spiced Vanilla Pear Butter


You see how in the picture above the spoon has a heavenly like shine?
That's for real.
That's how good this stuff is.


A sweet senior lady from our church gave my a few boxes of pears earlier in the fall and this angelic spread was a (successful!) attempt to use up the last of those pears.


This was really easy to make. I made a few mistakes (mostly due to laziness) but I think it only enhanced the overall product.


Mistakes like: I didn't peel the pears. 
I know I should've but 7lbs of pears?!? That's a lot of peeling and sometimes I can barely find a sane moment to brush my teeth let alone do unnecessary peeling. Plus who wants to see all those peels go to waste?
 Not me.
So instead I puréed twice, once after the pears were cooked (as instructed) and then again after the spices where added and it had been cooked for about an hour. All this puréeing made it as smooth as.... you guessed it.... BUTTA!


My other hiccup in this pear butter making process happened when I left the stuff unattended for about an hour and surprise, surprise, the bottom started to burn.
Fortunately,
I caught it just in time and something beautiful happened. 

Hot sugar got hotter and became caramel. 
That's when it was elevated to food for the angels.
(So I guess this is caramelized pear butter - but good luck if I can ever do that again.)


Try this out for the holidays.
It's fantastic on toast, pancakes, stirred into oatmeal and great with cheese.
There's just something divine about it.


Spiced Vanilla Pear Butter
Makes: 8 x 8oz jar or 4 pints
Adapted from: GoodLife Eats

7lbs pears (cored and peeled if you want)
½ cup water
zest and juice of 1 lemon
2 cups granulated sugar
3 tsp vanilla extract
2 tsp cinnamon
½ tsp cardamon
¾ tsp nutmeg
juice of 1 orange

Directions:

1. In a large stainless steel saucepan, combine the pears, water, lemon zest and juice. Bring to a boil over medium-high heat. Reduce heat and boil gently, occasionally stirring, for 20 minutes.
2. Working in batches, transfer mixture to a food processor fitted with a metal blade and puree just until a uniform texture is achieved. Do not liquefy. Measure 8 cups of pear puree (I used the excess as Pearsauce).

3. In a clean large stainless steel saucepan, combine pear puree, sugar, orange juice, vanilla, cinnamon, cardamom, and nutmeg. Stir until sugar dissolves. Bring to a boil over medium-high heat, stirring frequently. Reduce heat and boil gently, stirring frequently, until mixture thickens and holds it shape to a spoon and liquid does not separate. ( I cooked it on low heat for about 2.5 hours.)
3. Meanwhile, prepare canner, jars and lids: Wash and rinse the jars in hot soapy water. Drain the jars well of any excess water. Set the screw bands aside - they don't require sterilizing. Place the lids - the flat round portion of the two-piece closures - in a small saucepan, cover with water and bring to a simmer. Don't boil. Keep lids hot until you're ready to use them.
4. Ladle hot butter into hot jars, leaving 1/4 inch head-space. Remove air bubbles and adjust head-space, if needed, by adding more butter. Wipe rim. Center the lid on jar and screw band down until resistance is med, then increase to fingertip tight.
5.Place jars in canner, ensuring they are completely covered with water. Bring to a boil and process for 10 minutes. Remove canner lid. Wait 5 minutes, then remove jars, cool and store.


Friday, November 19, 2010

Chili-Lime Marinade


Dinner at my house is usually dictated by what's dying in the fridge and needs to be used up.
The other night it was a lime facing a lonely death in the vegetable crisper.
A dried out old lime.
Doesn't that sound appetizing.


Nonetheless, I subscribe to 'waste not want not' so the dry lime had to be used. 
I had been thinking about doing a citrus rosemary marinated chicken but since I didn't have any rosemary: no go.

Fortunately, the internet is a vast resource for lime recipes so it was easy to find an alternate solution.


This chili lime marinade was excellent. I doubled the recipe to get enough for my chicken and I'm glad I did.
More marinade = More Flavour. Simple.

Next time I might try it on roasted veggie kebobs. Of course, I'll have to wait until another lime dries up in the fridge.


Chili Lime Marinade
Makes about ¼ cup
Adapted from: All Recipes

3 tbsps olive oil
1 tbsp red wine vinegar
1 lime, juice and zest
1 tsp chili powder
½ tsp paprika (smoked if you have it)
½ tsp onion powder
½ tsp garlic powder
cayenne pepper to taste
salt and pepper to taste

Directions:
1. In a small bowl whisk together olive oil, vinegar and lime juice. Add zest, chili powder, paprika, onion powder, garlic powder, cayenne, salt and pepper and whisk until smooth.
2. Marinade veggies, chicken or tofu for at least 1 hour. (Longer if possible.)

Wednesday, October 27, 2010

Pumpkin Spice Syrup


This is fall flavored syrup.
Just trust me on this.
I don't lie about fall.
Or syrup.


As Buddy the elf once said,
"We elves try to stick to the four main food groups: candy, candy canes, candy corns and syrup."
Of course I'm not an elf but I do have an affinity for elf culture,
so I take my syrup seriously.


This syrup is really yummy.
It's intended to be used to make the infamous pumpkin spice latte but I've only used it on pancakes so far.


It was a little thinner than regular pancake syrup but it still worked well and tasted great.

This whole straining thing didn't work for me. I cooked the mixture too long which made it too thick.

The cloves and nutmeg are definitely the dominate taste so feel free to adjust the spices to your preference.


Happy Fall!

Pumpkin Spice Syrup
Makes: about 1 ½ cups

1 ½ cups water
1 ½ cups sugar
1 tbsp ground cinnamon
½ tsp cloves
½ tsp ginger
1 tsp nutmeg
3 tbsp pumpkin puree

Directions:

1. In a small pot over medium heat, dissolve sugar in water.  Once sugar is dissolved, add remaining ingredients.  Allow to cook for 6-8 minutes, stirring frequently.  Do not boil.
2. Strain mixture using cheesecloth or a tea towel.
3. Pour into a small (8-10 ounce) bottle and store in the refrigerator. 

Linked to: Seasonal Sundays

Wednesday, September 15, 2010

Homemade Kahlua Sauce


This is probably the only time I will ever condone the use of a large amount of instant coffee.

For this recipe it's needed, but usually
♪There's nothing like the real thing, baby.....♪


I love recipes like this. 
Boozy coffee recipes!?!

No, no.... I mean recipes that can double as gifts.
Seeing as how the gift giving season is quickly approaching (*glee*) it's nice to have ideas early on. 


This particular recipe requires at least a month to steep before reaching it's full delicious potential so I'll probably make up a few batches now so I have them on hand for Christmas.

Plus!
Doing that now will reduce some of the stuff to do once the season has hit full force.
I love that... Christmas hitting full force.


It's sweet, it's thick, it has a heady coffee aroma...mmmm. 
Why am I giving it away again?

Or right.... 'cause I'm not much of a drinker and I can only make so many batches of chocolate kahlua cupcakes.


Homemade kahlua sauce is simple to throw together and the ingredients are easy peasy to come by.


Make this for a gift or just for yourself.... because.... because.... because why not?


Homemade Kahlua Sauce
Makes about 3 ½ cups
Slightly Adapted from "Too Many Cooks'' by Emily Franklin

4 cups sugar
1 cup instant coffee granules
2 cups boiling water
3 tbsp vanilla extract
⅔ cup vodka

Directions:
In a heat proof bowl stir together sugar and coffee. Add water and stir until completely dissolved. Let cool. Add vanilla and vodka. Pour into bottles (I used my old Kahlua bottle). Keep for a least a month before enjoying.
Related Posts Plugin for WordPress, Blogger...