Pages

Thursday, August 12, 2010

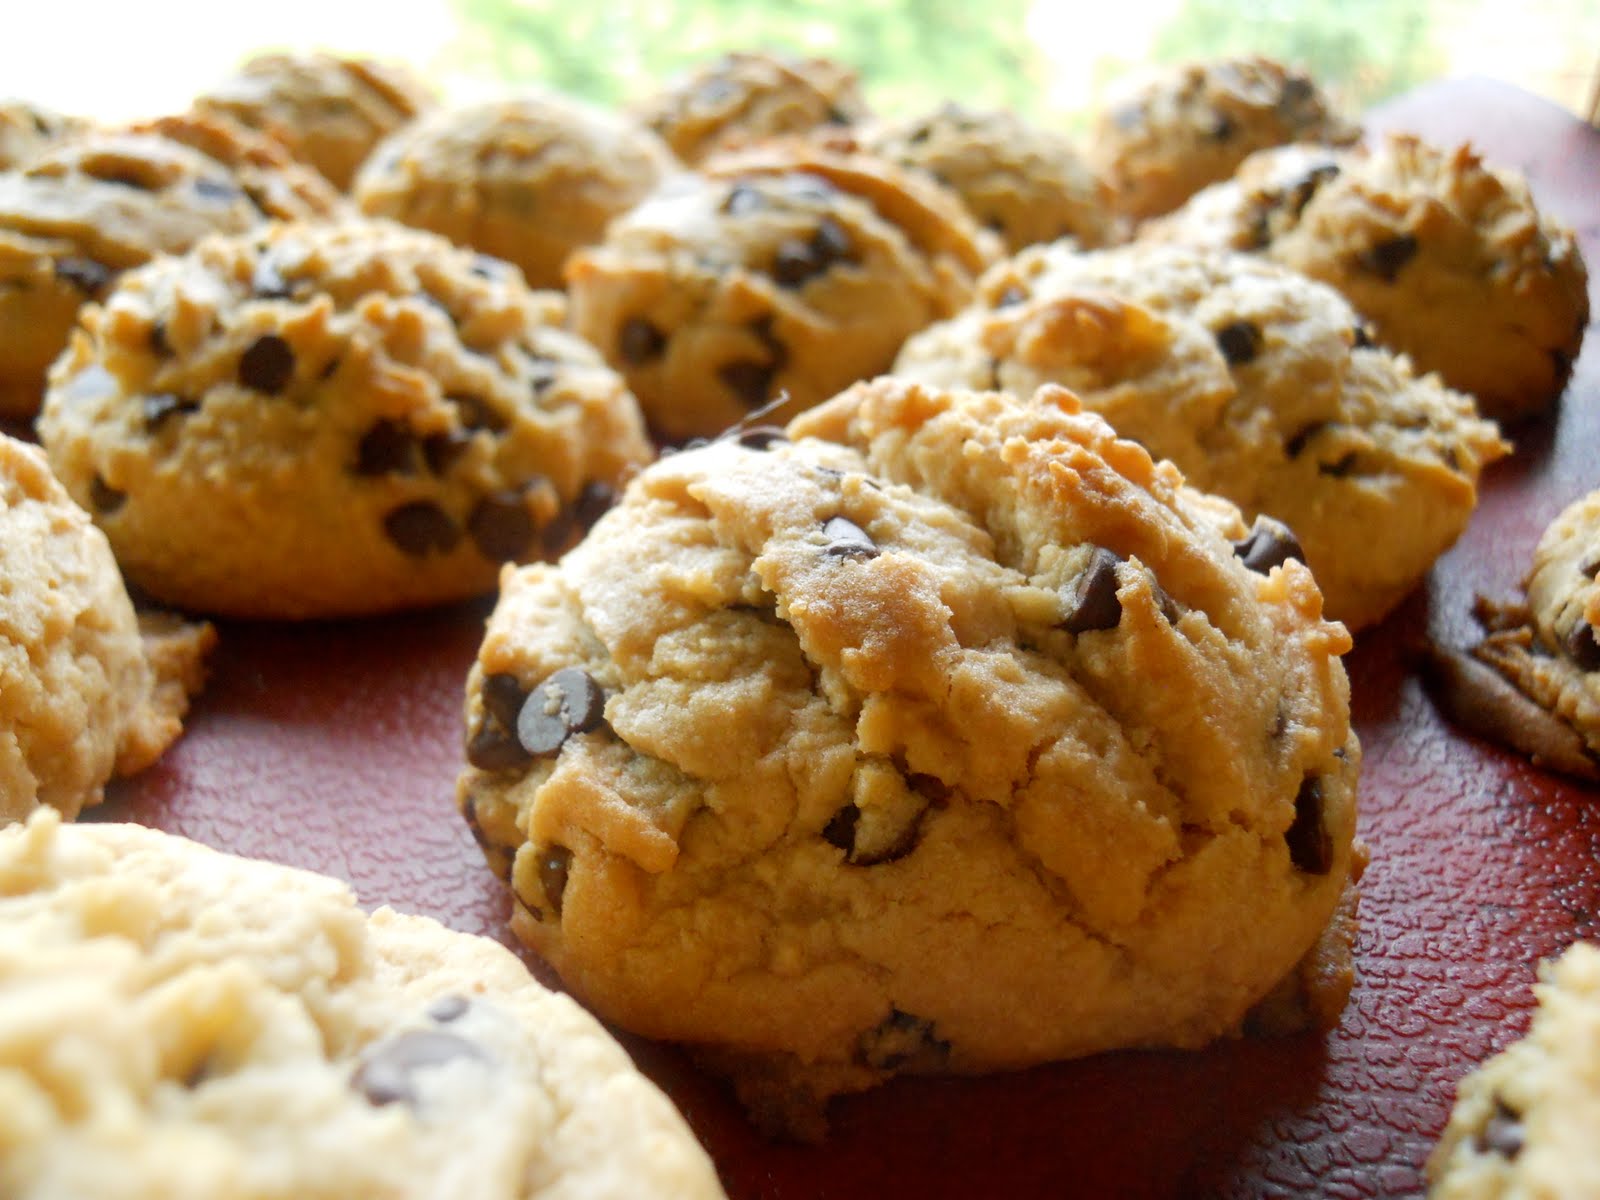
Peanut Butter Chocolate Chip Cookies


I think I may have alluded to my affection for peanut butter and chocolate in my last post.


Remember when I said I ate 40 peanut butter cups? That was 40 peanut butter cups ALL BY MYSELF.

They were on sale and I have a thing for sales. 
They lure me, they call my name, they cause me to buy irrational things. 
"Oh, a 20kg bag of dog food for only $15.99! We don't have a dog but maybe one day we will. I'll just buy this here dog food and keep it for 5 years and toss it when mice have chewed through most of the bag, become as big as dogs and overtaken my home." Yea, that's a good idea.


Sale ranting aside, I've been making these cookies for over a decade and they never disappoint.


They're a little bit salty, a little bit sweet, a lot buttery, crispy on the outside, soft on the inside. 

Plus, they have to be great because they're PB and Chocolate!!! 
They were meant to be together.... like Sonny and Cher, Rachel and Ross, John and Yoko!


When a love like this gets together you get some pretty perfect, pretty satisfying cookies.


Peanut Butter Chocolate Chip Cookies
Makes 2 dozen(ish)
Adapted from: again, no idea 

1 cup crunchy peanut butter (preferably natural)
1 cup softened butter
2/3 cup white sugar
1/2 cup brown sugar
2 eggs
2 1/2 cups all purpose flour
1 tsp baking powder
1/2 tsp salt
1 cup chocolate chips

Directions:
1. Preheat oven to 350°F
2. Beat together peanut butter and butter until soft and creamy (about 1 minute). Gradually add both sugars and continue to beat until fluffy.
3. Add eggs one at a time to this yummy sweet peanut butter fluff.
4 Turn off mixer and add flour, baking powder and salt. Beat again until all flour is incorporated.
5. Add chocolate chips and mix gently for just a few seconds.
6. Use ¼c ice cream scoop (if you have it) to scoop cookie balls onto greased cookie sheets.
7. Bake for about 10 - 15 mins until tops are golden.


Tuesday, August 10, 2010

Vegan 'Cheese' Bread


There are 6, no, 7 things I think you need to know about me: 


1) I love bread and I love Christmas but I don't like Christmas Bread. Go figure.


2) I like paying my property taxes. There I said it. It makes me feel like a grown-up contributing towards my town's well being.


3) I hate when people do obviously stupid things. You know what they're doing is dumb, you tell them what their doing is dumb (because you know from personal experience) but still they do it and sometimes they don't even regret it.


4) I watch Mad About You episodes online when my house isn't clean, my laundry isn't done and my bed isn't made.


5) Sometimes I neglect my child for my love of bread. It's a sad thing but it happens.


6) I had 6 Reese's Peanut Butter Cup 8 packs in my freezer last week (so 48 cups), and now there is 1 pack. And my husbands been at work. True story. 


7) After the peanut butter cups I ate all 18 pieces of this bread and I don't regret it. 

I'm one of those people.

Make this bread today. It's yummy and full of vitamin B12. (Oh, and it'll make your pee really yellow)


Vegan 'Cheese' Bread Sticks
Makes 18 bread sticks

1 tbsp yeast
1 tbsp sugar
½c warm water
½ small onion, finely chopped
1 garlic clove, minced
1½ cups flour
2 tbsp olive oil
4 tbsp nutritional yeast
1¼ tsp salt
1 tsp mustard
¼ tsp pepper


Combine yeast and sugar in small bowl. Pour warm water over and whisk for a moment to mix together. Let sit in a draft-free place for 10-15 minutes, until yeast and sugar are dissolved and mixture has become frothy.

In a small saucepan sautée onion and garlic in a little olive oil until onion becomes soft. Add this to the yeast mixture, along with the rest of the ingredients. Use the dough hook on your mixer to knead dough for 5 -7mins or until the dough forms a ball. Divide into 18 even pieces. Roll pieces into skinny sticks and place on oiled baking sheets. Let sit in warm place until they have doubled in size.


Preheat oven to 375°F. Bake breadsticks for 10 minutes, or until golden brown. Serve with ranch, marinara, or your favorite dipping sauce. 

Sunday, August 8, 2010

Bread Machine Rye Bread (sort of)


An ode to this bread:

I love you, homemade bread. 
I love the way you make the house smell while you bake. I love how soft you become as you rise. I love the way melted butter seeps into your little air pockets. I love your slightly tangy yeast taste. Even when you don't always love me, dear bread, I sure as heck love you.

The End
Hello Mr. Huggy Puppy. I see you back there.

I don't know if my high school English teacher would have passed that as an ode, but it came from the heart and I meant every word.

And I see you too, Mr. Playpen
I love the convenience of my bread maker but I do not love the shape of the loaves it makes.  
So when I make bread (specifically this bread), I make the dough in the bread machine and then take it out and let it rise in a regular loaf pan.
I then bake it in the oven and...... 

Don't be judgin' my slicing. I'm all about the taste, not the looks.
Voilà! Perfect bread everytime.

Bread Machine Rye Bread
Makes 1 1.5lb loaf
Adapted from: I have no idea, really - no idea

1 1/3 cup warm water
¼ cup oil (I use canola)
¼ cup honey, molasses, or maple syrup
2 cups rye flour
1½ cups whole wheat flour
1¼ tsp salt
2½ tsp yeast
1 tsp caraway seeds (optional)

Directions
1. Add all ingredients to bread machine in the order listed. Be careful not to let the yeast touch the water.
2. According to the manufacturers instructions, set machine to dough cycle and begin.
3. Depending on your machine, it'll take anywhere from 30mins to 1hr for the dough to be kneaded into a cohesive ball. You'll probably need to check the machine a few times.
4. When the dough begins the rise cycle, remove and place it into a well oiled loaf pan.
5. Cover and allow to rise in a draft free areaa until it doubles in size (approx 1 hr).
6. Preheat oven to 350°F. 
7. Bake for about 25mins on the center oven rack.

Friday, August 6, 2010

Fridge Cleaner Grilled Calzone


So around 2:00pm yesterday I was feeling.... hmmmm...... what's the phrase?

Oh, I know

Tired and Uninspired

Ever since le bebe was born, food has become a bit of a chore. 

I've always wanted to eat but now I need to eat. Not only that, but I need to be careful what I eat, ugh.

So there I was, looking for something relatively healthy and quick and tasty and cheap and......preferably something that would make itself for lunch.

What to eat? What to eat? I had a little bit of sweet red pepper, half a shallot, some leftover pizza dough, a squishy tomato, about 1 tbsp of marinara sauce, couple slices of pineapple, fresh mozzarella and a few frozen bacon bits.


No problemo. I'll make a pizza.

Oh wait! It's 40 trillion degrees outside and I don't want to turn on the oven.


Enter my trusty George Foreman Lean Mean Grilling Machine.


Now, it's hard to tell from this photo but this lean mean fat reducing grilling machine is small. Much to small, in fact, to fit a whole pizza on it.

(Why didn't I use my bar-b-que I am only now asking myself?)


Hence, my vision of a pizza was folded into the reality of a calzone.

What can I say? Desperate times call for delicious measures :)


And this, was certainly delicious.


Wednesday, August 4, 2010

Swamp Mint Chocolate Chip Ice Cream


Okay, the mint didn't really come from the swamp.
I'd like to say it did but I'm not even sure where the swamps around here are.... and even if I did know where they were I would not go visit them.


This lovely bundle of minty freshness came from my Mom and Dad's backyard. They do have a very swamp like pond back there.


I have no idea what kind of mint this is but it tastes very wild, very wild indeed. My husband says it smells/tastes like swamp mint. I'm not sure if that's even a real thing but I'm gonna go with it.

Whipping Cream, oh how I love thee.
My husband and his discerning taste buds love mint chocolate chip ice cream.  So when I came across David Lebovitz's recipe from The Perfect Scoop, I was excited to give it a try. 


This husband, he's a special kinda guy so I try to make him happy. 

This ice cream will make him happy.


I don't have an ice cream maker but that's no problem.

I've made ice cream before..... it takes a little time but it's worth it.

Now, let me give you a word of advice if you don't own an ice cream maker.


Here it is:

 Don't start making this ice cream at 8:00pm. Emphasis on the PM!!!.


Otherwise, you'll be setting your alarm at one hour intervals into the wee, wee hours of the morning to stir the ice cream.

It's not a nice thing. 
It's not good for your mood. Believe me.


That inconvenience aside, this ice cream was pretty good.

Swamp mint and all.

Although, if I make it again I'm going to try it with chocolate mint.

I melted down two Jersey Milk chocolate bars for the chocolate chips.... that's definitely my favourite part.


Ahh....... the things we do for love.


Mint Chip Ice Cream
Makes about 1 quart (1l)
 from The Perfect Scoop (Ten Speed Press)

For the mint ice cream:
1 cup (250 ml) whole milk
3/4 cup (150 g) sugar
2 cups (500 ml) heavy cream
pinch of salt
2 cups packed (80 gr) fresh mint leaves
5 large egg yolks

For the chocolate chips:
5 ounces (140 gr) bittersweet or semisweet chocolate, chopped

Directions:
1. In a medium saucepan, warm the milk, sugar, 1 cup (250 ml) heavy cream, salt, and mint.

2. Once the mixture is hot and steaming, remove from heat, cover, and let stand for an hour to infuse the mint flavor.

3. Remove the mint with a strainer, then press down with a spatula firmly to extract as much mint flavor and color as possible. (You can also use well-washed hands to do it as well, making sure the mixture isn't too hot to safely handle.) Once the flavor is squeezed out, discard the mint.

4. Pour the remaining heavy cream into a large bowl and set the strainer over the top.

5. Rewarm the infused milk. In a separate bowl, whisk together the egg yolks, then slowly pour some of the warm mint mixture into the yolks, whisking constantly, then scrape the warmed yolks back into the saucepan.

6. Cook the custard, stirring constantly with a heatproof spatula, until the mixture thickens and coats the spatula. If using an instant read thermometer, it should read around 170ºF (77ºC).

7. Immediately strain the mixture into the cream, then stir the mixture over an ice bath until cool.

8. Refrigerate the mixture thoroughly, preferably overnight, then freeze it in your ice cream maker according to the manufacturer's instructions.
While the mixture is freezing, melt the chocolate in a small bowl over a pot of simmering water, or in a microwave oven on low power, stirring until smooth. Place a storage container in the freezer.

9. When the ice cream in the machine is ready, scribble some of the chocolate into the container, then add a layer of the just-churned ice cream to the container. Scribble melted chocolate over the top of the ice cream, then quickly stir it in, breaking up the chocolate into irregular pieces. Continue layering the ice cream, scribbling more chocolate and stirring as you go.

When finished, cover and freeze until firm.


Monday, August 2, 2010

Iced Summer Berry Tea

So it's a thousand degrees out and you are thirsty. 

VERY THRISTY.

Juice just isn't gonna make the cut.  It's too sweet and somehow not wet enough.
Soda or a slurpee will definitely not do (no, they won't, John).
Water is really much to blasé for this kind of thirst.

What are you going to do?


May I make a suggestion?


 Throw a couple of Tetley's summer berry tea bags in a tea pot with boiling water and let it steep for about 10mins. (More if you have the time)

Add lots of ice, stir and drink,
and drink
and keep drinking.

And when you're done make some more and put it in the fridge so you have it for the next time the thermostat hits one thousand degrees.

You'll really need it.

If you want to fancy it up add 7up or Sprite or lemonade or 7up, Sprite and lemonade. 

You won't regret it.

It's delicious.

Now that's what I call crisp and refreshing.


There's Mommy's little helper :)
If you can find one of these to help, they sure make the heat a little more bearable.
Related Posts Plugin for WordPress, Blogger...