Pages

Wednesday, October 6, 2010

Chewy Molasses Chocolate Chip Cookies


I saw these and I wanted them. 
So I made them.

And then, when I remembered, I took a really bad picture of them.


I wanted to make these cookies so badly that I didn't even use the right ingredients!

The recipe (originally from Alton Brown) says specifically not to use blackstrap molasses.

But all I had was blackstrap molasses and I really, really wanted to make these cookies so I used it anyway.

The recipe also calls for bread flour but did I have bread flour? No.
So what did I use?
All purpose.

Kosher Salt?
Didn't have it.
Used regular old table salt.


You'd think with all these shoddy substitutions these cookies would've turned out terribly: flat, over salted and crazy molassesy.


But they didn't.

They were quite good, in fact.

Everything I wanted and needed them to be.

Dark, chewy, caramely, and chocolatey. 


(My apologies for the bad photos. 
I was way to concentrated on eating them to document them.)


Chewy Molasses Chocolate Chip Cookies
Makes about 3 dozen
Source: Joy the Baker

1 cup unsalted butter, softened
2 cups plus 2 tbsp bread flour
1 tsp kosher salt
1 tsp baking soda
1 ½ cups granulated sugar
¼cup plus 1 tsp dark molasses (not blackstrap)
1 egg
1 egg yolk
1 ½ tsp vanilla extract
2 cups dark chocolate chips
sea salt for sprinkling on cookies

Directions:
1. Preheat oven to 350 °F. Melt the butter in a heavy-bottom medium saucepan over low heat. Sift together the flour, salt, and baking soda and set aside.
2. In a medium sized bowl, mix the granulated sugar and molasses until no large molasses clumps remain.
3. Pour the melted butter in the mixer’s work bowl. Add the homemade brown sugar. Cream the butter and sugar on medium speed for about 3 minutes. Add the egg, yolk, and vanilla extract and mix until well combined. Slowly incorporate the flour mixture until thoroughly combined. Stir in the chocolate chips.
4. Chill the dough for about 20 minutes, then scoop onto parchment-lined baking sheets.  Lightly sprinkle each dough ball with a few flecks of sea salt.  It really brings out the chocolate flavor.
5. Bake for 8 to 10 minutes or until golden brown, checking the cookies after 5 minutes. I like these cookies to be just a bit under-done. Rotate the baking sheet for even browning. Cool completely and store in an airtight container.

Friday, October 1, 2010

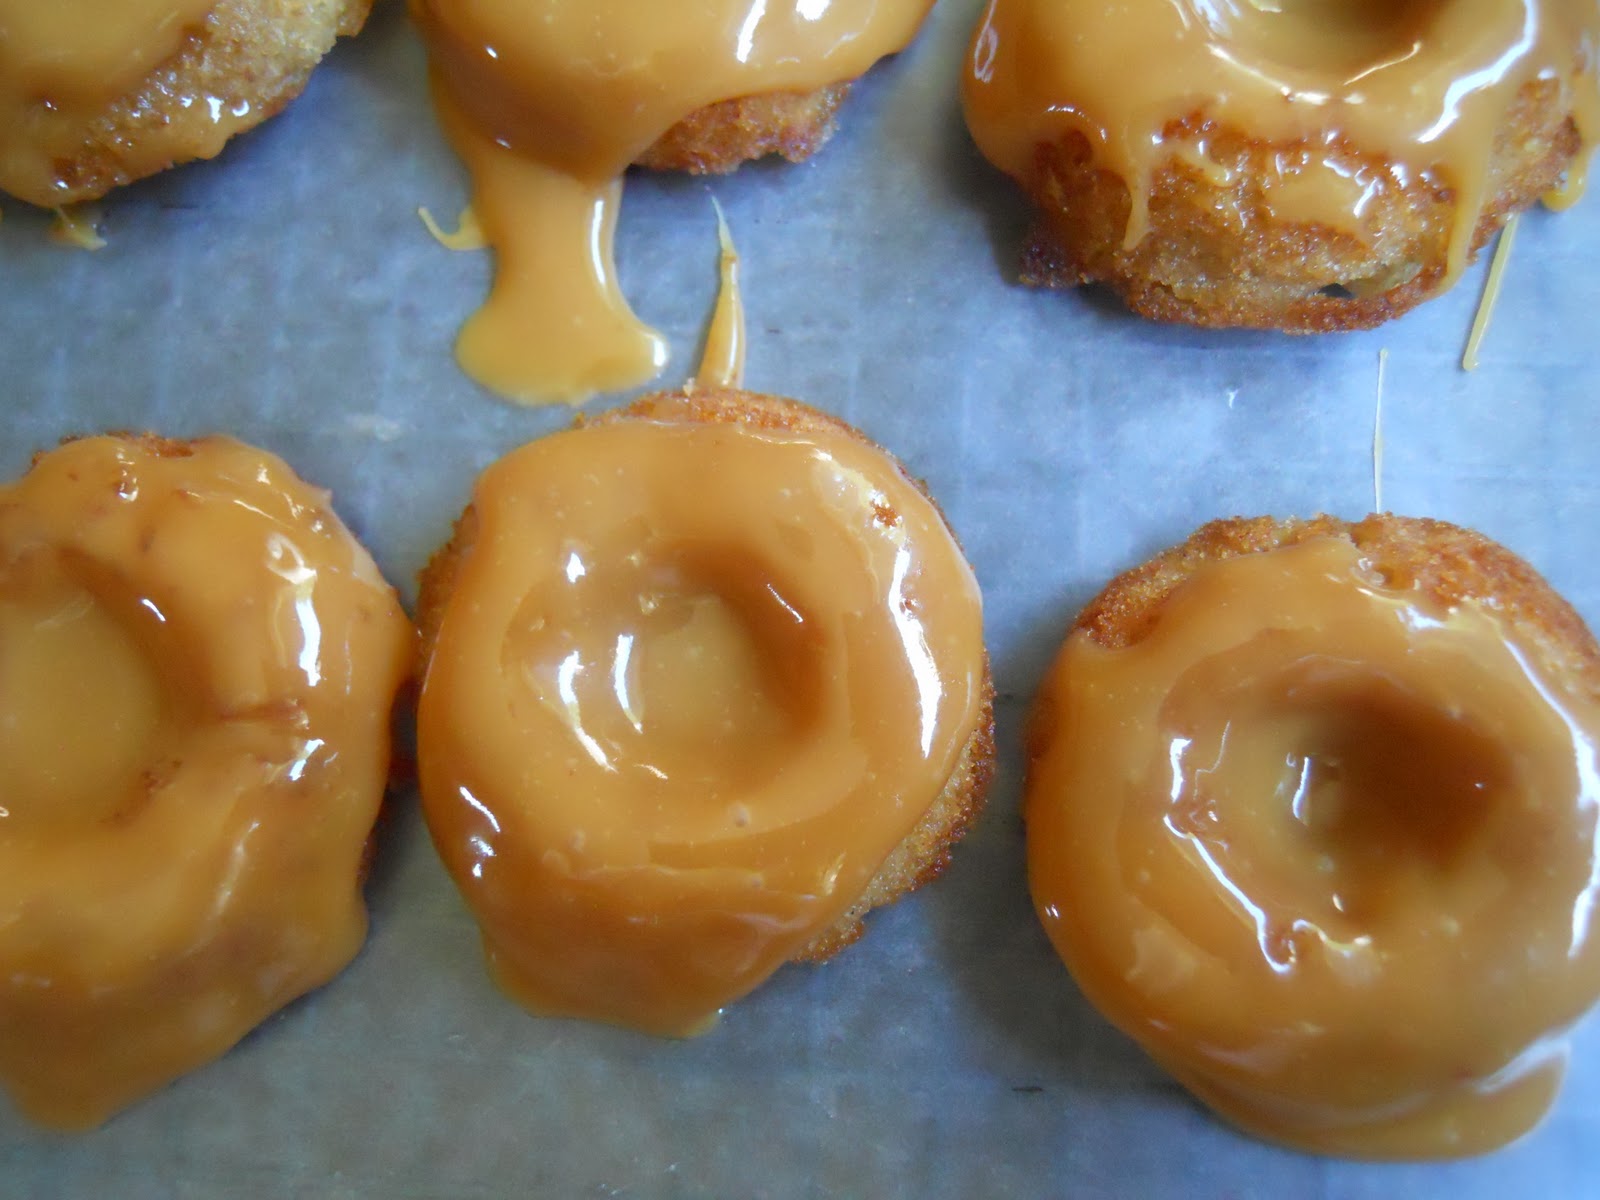
Baked Apple Caramel Donuts


The only reason I made these donuts (doughnuts?) is because my mom just bought a donut pan. 


I think it was an impulse buy. 

Why else would anyone buy a donut pan?

Muffin pans I can get behind. They're multifunctional. You can use them for  popovers, cupcakes, toast cups, something else and I'm sure something else. 


Donut pans though......
I can't think of another thing to use a donut pan for.
Maybe a bagel?


I don't understand the purpose of this pan. Why would you ever bake a donut when donuts are meant to be fried?

Deep fried. 
In oil.
Lots of it.
Not baked.

Period.


I might of just given you a clue to what I thought about these donuts. 

They were good. They just weren't great.
That's what happens when you mess with the natural order of things.
You get food that is sub par.


They tasted more like a muffin than a donut. I knew they were baked but I still kept expecting them to have a crunchy fried outside.


The caramel, on the other hand, was anything but sub par.
It was delicious, super easy and the perfect consistency.

I'll definitely be making it again.... just not on these donuts.


Keep to the natural order of things and fry your donuts.

Baked Caramel Apple Donuts

Makes about 48 mini donuts
Source: Shutter Bean

1 ¼ cup flour
2 tsp baking powder
½ tsp ground cinnamon
½ tsp salt
2 eggs at room temperature
½ cup packed light brown sugar
½ cup granulated sugar
½ cup vegetable oil
2 tsp vanilla extract
3 medium apples peeled and shredded
1 ½ cups chewy caramel candies
3 tbsp whole milk or cream

Directions:

1. Preheat oven to 350°F. Spray donut pans really well and set aside. Mix together flour, baking powder, cinnamon and salt in a large bowl.
2. In a medium bowl whisk together eggs and both sugars until smooth. Whisk in oil and vanilla. Stir liquid mixture into flour until just combined. Stir in apples. Carefully spoon the batter into the prepared donut pans until almost full. Bake until golden. (About 15 - 20 minutes.)
3. In a small, microwaveable bowl, combine the caramel and milk. Microwave until smooth, stirring at 1 minute intervals. For small donuts dip them into the caramel. For large donuts spoon the caramel on top.

Wednesday, September 29, 2010

Apple Chips


Remember how I said I have ten thousand pounds of apples?
(*I exaggerate a lot so please don't take my amounts literally. Thanks.)


Well, I am indeed still figuring out ways to use those apples.

I guess with this many apples it was inevitable that I would eventually be spending my afternoons coring and slicing to make apple rings for the dehydrator.


Side Note: Dehydrators are wonderful inventions. You put what ever you want in, leave them to be for several hours and your perishables are transformed into non-perishables. In this case apples slices are converted into lovely little dried apple chips. Perfect for the ever curious 7 month old to snack on.

Apple chips are for eating, not wholly mammoths!

And now back to the show:
 It took a lot of work to get the apples prepped for the chips but it was worth it!
They're a great healthy snack to eat on the run, they don't have to go in the fridge and they were super cheap to make.

All qualities I admire in my food.


Healthy, convenient and cheap. What's not to love?


Apples Chips

1. Wash apples well. If desired remove the peel. 
2. Core apples and slice horizontally to create an 'apple ring', about ¼'' to ½'' thick.
3. While you are prepping apples, place apple rings into a cold bowl or sink of water with approximately 2 tbsps of salt sprinkled in to prevent apples from turning brown. When you have the desired amount of apple slices, dehydrate according to manufacturers instructions. If you do not have a dehydrator put your oven on low heat (between 130°F and 150°F) and bake for about 3 hours checking often for desired dryness.

Sunday, September 26, 2010

Maple Bacon Kettle Corn


 Yes, you read the title right.
Yes, I really did make this.

That, for the record, is maple syrup being poured over the bacon, not grease.

How was it, you ask?


It was yummy, yummy in my tummy.


It's probably not something I'm going to start making and eating everyday... not unless I want to die before 30. 
But I plan to make it my 'special occasion' popcorn. 


Special occasions such as when my vegetarian sister visits and wants to share a bowl of popcorn.
Mwahaha!
Happy Birthday, sister.


Maple Bacon Kettle Corn
Makes about 3 cups

4 slices bacon, cooked, fat reserved
1 tbsp maple syrup
½ cup popcorn kernels
¼ cup cooking fat (use reserved bacon fat and olive oil or vegetable oil to equal ¼ cup)
3 tbsps sugar
1 ½ to 2 tsp salt (depending on your taste

Directions:
1.Cook bacon until brown and crisp. Set aside to cool. Once cool, chop into small bit and toss with maple syrup
2. Measure out the bacon grease. Add vegetable or olive oil to make ¼ cup cooking oil.
3. In a large pan over medium high heat, heat the oil mixture. Add the corn kernels. Sprinkle over the sugar and 1 tsp of salt. Cover the pan with a tight fitting lid and wait for the popping to begin.
4. Once the popping begins, hold together the pan and lid and shake the pot. Shake often through the popping process. This will help ensure the sugar doesn't burn the pan and popcorn.
5. Once finished popping, remove the lid and add the remaining salt. Use a large spoon to stir the popcorn. You don't want the hot sugar to burn you. Pour in the bacon and maple mixture. Toss together and serve.

Friday, September 24, 2010

Apple Juice


I love the fall. Love it. Love it. Love it.
It makes me want to watch You've Got Mail, my favorite movie ever, while cooking with cinnamon and cloves. 


It also makes me want to preserve. 
And what's the best and cheapest thing to preserve in the fall?

APPLES!
(Especially if they're free apples from the neighbour's tree.)


Since I have about ten thousand apples (I'm exaggerating), and I didn't feel like peeling them I decided to make some juice.

Enter my mom's trusty Mehu-Maija.


This juice extractor is basically a big steamer that catches the juice from fruits or vegetables.
It's a great way to practice 'kitchen recycling'.
You can use any sort of food scrap in it. (In this case apples.)
I threw in apple cores, apple peels, soft apples and bruised apples and it steamed their little hearts.
Think of it as a last stop before the compost.


I know you're probably thinking. "Eww, yuck, I would never do that !"
But seriously, what do you think they make apple juice out of?
It's not the perfectly rounded, beautiful red apples you buy at the grocery store. It's the apples that didn't make the cut. The ones that fell off the tree and were left sad and all alone until someone found them and took the bruised and soft little guys and turned them into something delicious.

True story.


The steaming process is great because it pasteurizes the juice, killing any pesky bacteria that might want to attack you in your sleep. Or when you're awake.
('Cause no one wants to get hit with bouts of diarrhea day or night.)

It's also great because the hot juice is easily preserved by pouring it into scorching hot jars and puttin' on red-hot lids. No processing required and they seal wonderfully.

Tasteless, dry apple mush.

I think the juice is great on it's own or added to some soda for a punch.


Mmmm.... fresh apple juice. The taste of fall!

Wednesday, September 22, 2010

The Great Pickle Disaster


As you can see, we made some pickles.
The cloudy brine doesn't make them look very good, does it? 

So let me tell you about 'The Great Pickle Disaster':


It all started when I decided to buy a huge box of pickling cucs. I thought to myself, "Self, let's make some pickles so we can have them to give away for Christmas or whenever the mood strikes." Self replied, "That's a great idea, Jess''.

So away we went to my mama's house to make some pickles with her.


We packed the cucs in ice to make them extra crunchy. 
We peeled cloves of garlic and bought coarse salt and big heads of fresh dill.
We made a vinegar brine.
We sterilized jars and lids, lids and jars.
We packed the pickles into these jars with dill, garlic, salt and brine and set them aside.

The next day they looked pretty good. A few jars hadn't sealed but that was no problem we'd just redo them.


So away we went. 
We repacked the briny cucumbers in ice. 
We remade the brine and we resterilized the lids and jars, jars and lids.
Then we restuffed all these jars with new garlic, salt, wilty dill, new brine and icy cold cucumbers. 
Then we set these pickles aside.

Then you know what happened?
The original pickles that we thought had sealed started to get all cloudy and ominous and the lids began to pop up. No problem, I suppose....


So away we went (again).
We repacked, remade, resterilized, restuffed and set aside.

And do you know what happened???
(Remember this is the great pickle disaster not just the pickle disaster.)

Those pickles, they turned cloudy. All of them. Every single one.
So our great idea to make pickles? Not going so well. 
Big box of pickling cucumbers = zero, zip, zilch pickles.


 Then we did something smart. 
We enlisted the wisdom of a senior lady from our church (Hi Mrs. Breck!) to aid us in the perils of pickle making.
So away we went.
We repacked shriveled cucumbers in ice.
We made new brine (with 7% acetic acid vinegar).
We resterilized jars and lids, lids and jars.
We restuffed the jars with shriveled cucumbers, salt, brine, garlic and dill and then we processed the jars for 5 minutes and set them aside.

And do you know what happened?!?


Every single jar sealed!
And then over the next few days and even weeks?

None of them turned cloudy.

And the great pickle disaster was transformed to pickle success.

That, my friends, is what happens when you don't process pickles.
Learn from our mistake... PROCESS YOUR PICKLES!

How to Make Pickles (the right way)
*I'm not exactly sure of the amounts here - we used 30lbs of pickles which made about 20 quarts and 6 pints.  I think we used 2 heads of garlic for all those jars and about 6 cups of vinegar*

vinegar
coarse salt
dill
garlic cloves
pickling cucumbers
quarts and pint jars with rings and lids

Directions:

1. Pack cucumbers in ice (preferably overnight). Sterilize jars and lids. We put our jars in a 200°F oven and our lids in boiling water for at least 5 mins.
2. Make brine in a large pot on the stove using a 7:1 ratio of water to vinegar (ex: 7 cups water and 1 cup vinegar). Heat on medium high until it comes to a bowl.
3. Use a pot holder to grab a hot jar from the oven. Add to the jar: salt (for quarts add 1 tsp of salt and for pints add ½ tsp of sal), 1 clove of garlic and 1 head of dill. Stuff jar as full as possible with cucumbers leaving about 1 inch of head space. Add hot brine to the jar until cucumbers are covered. Wipe mouth of jar with a clean cloth and put on lid and ring. Set aside.
4. Continue doing this until you have enough pickle jars to fill a canner. 
5. Fill canner half full of water. Place on stove and fill with jars. Turn heat on medium high and cover. When the canner begins to boil start a timer for 5 minutes. When the timer beeps, carefully remove jars and set to the side undisturbed for at least 12 hours.
6. Pickles are best left to 'pickle' for 6 weeks before enjoying.

Related Posts Plugin for WordPress, Blogger...